It has been a little while since I last posted. Our house was under the attack of a terrible cold that lasts 2 weeks per person. Of course everyone gets it at different times! I am feeling much better now, though.

I really wanted to post a video art tutorial, but am still working out how to do those. HOWEVER, I do have a photo tutorial for you today! This was a commissioned piece with requested quote and colors, so I decided to take photos of each step. Keep in mind I worked on this over the course of 5 days, allowing drying time between the steps/layers.

I used a reclaimed white oak wood kneeling bench about 33 x 5 inches. After dismantling, it was ready for my artful purpose! You will see two boards in some photos, the other is for a wedding gift that I will finish later.
1. Sand smooth - I used a sander. Fill in holes with wood putty. Let dry over night. Sand again.
2. Prime with white gesso. Let dry. Sand in some areas to distress.

3. Apply petroleum jelly in spots where you want the white to show.
4. Paint with color. I mixed up this nice green using acrylic paints. Let dry.
------------------------
5. See in the corner how the petroleum jelly repels the paint? Wipe off the paint resisted by the jelly. I used paper towels.
6. Then I used baby wipes to get all the jelly off the surface, or you could use a slightly soapy rag. Let dry. Again apply petroleum jelly to the white and green spots that you want to show.
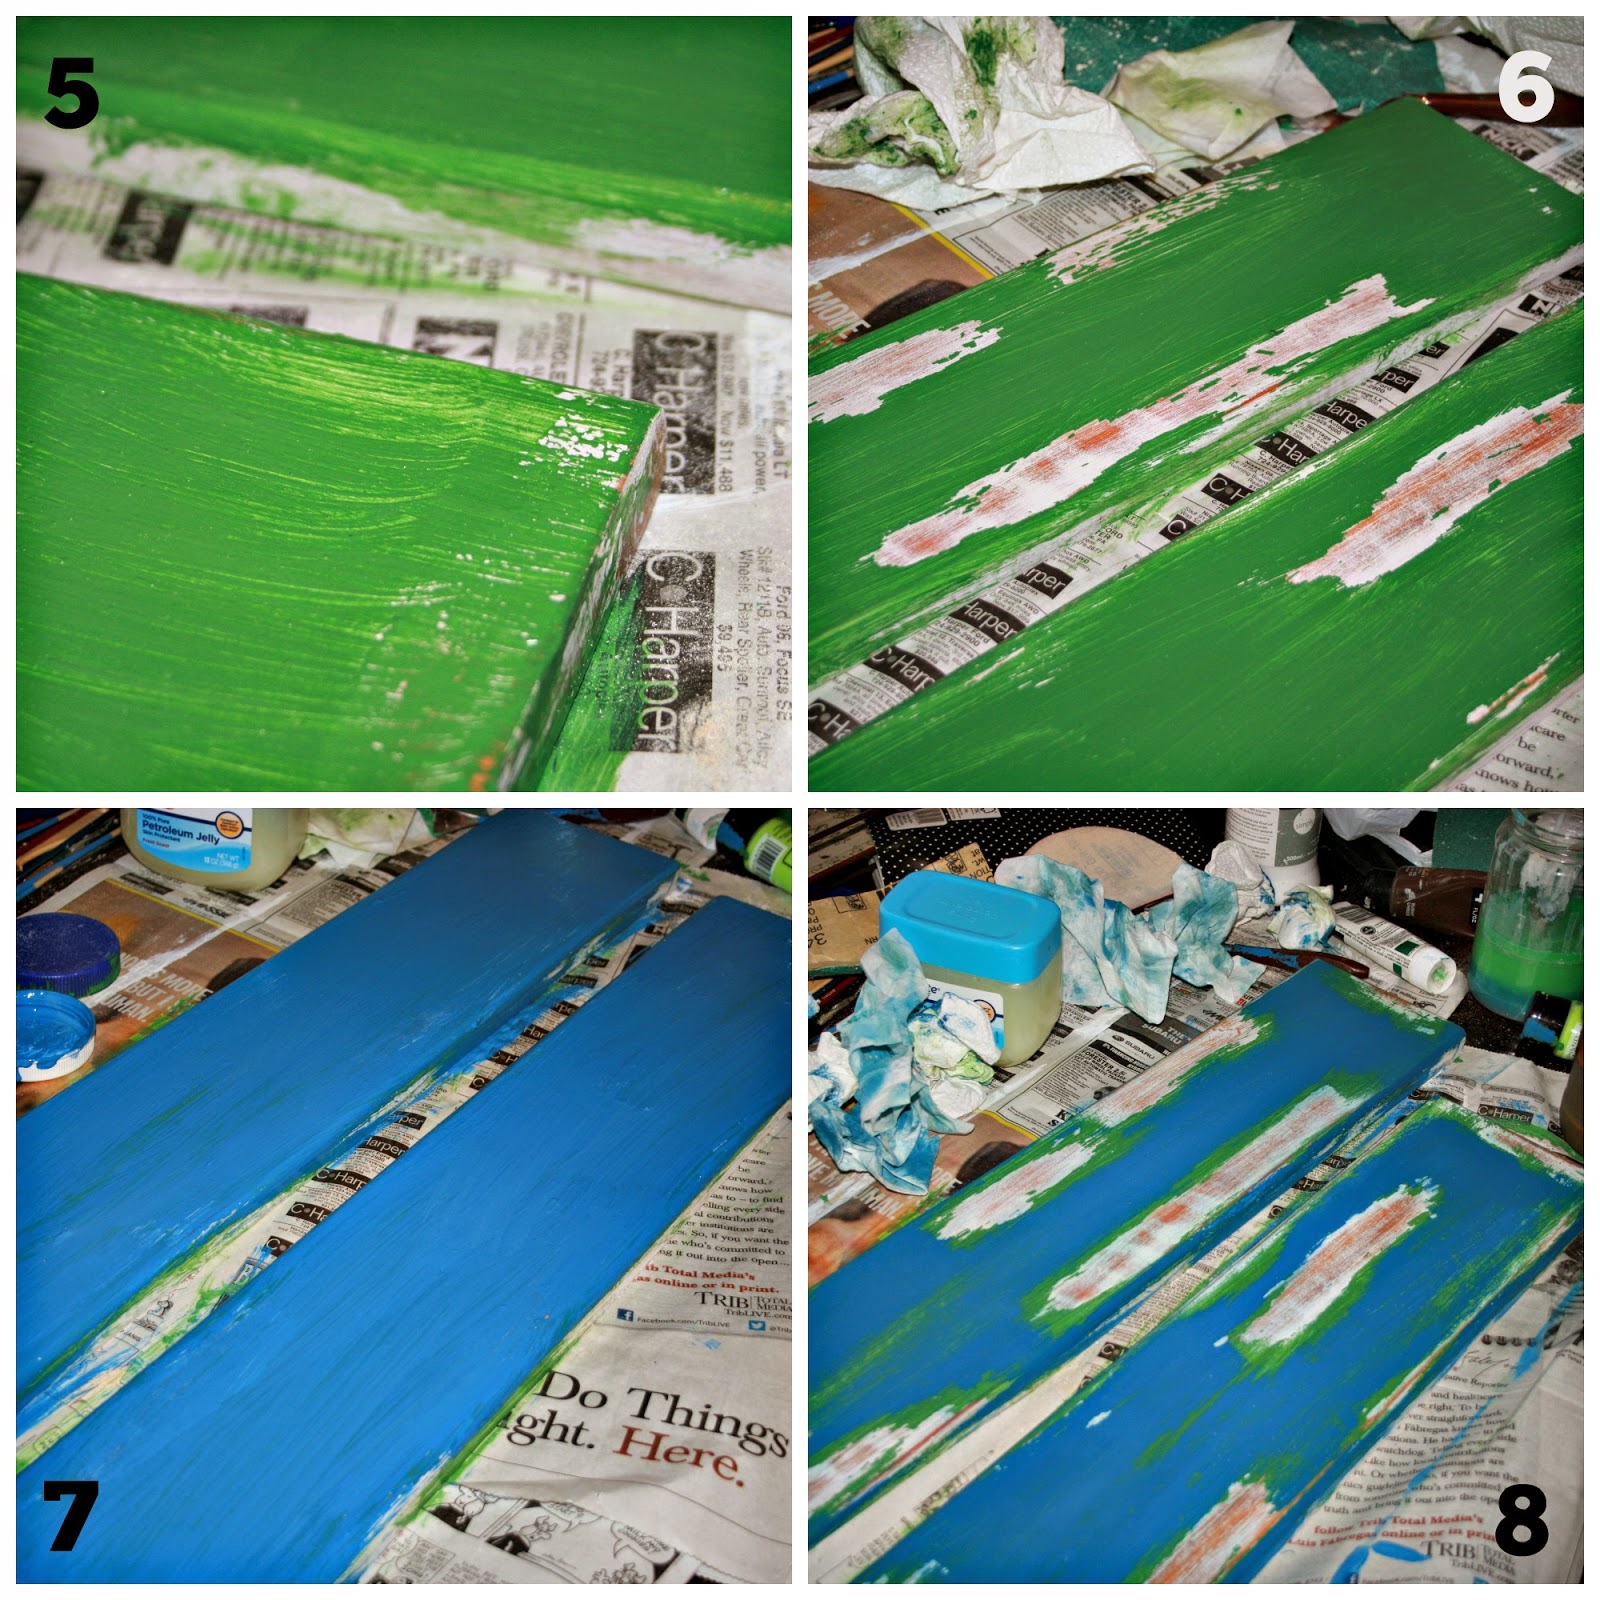
7. Paint a second color and let dry.
8. Again wipe off jelly w/ paper towels and clean it all off with baby wipes. I gave it a bit of a light sand at this point to get off any loose bits.
------------------------
9. I took a lighter blue and used a palette knife to scrape the color where I wanted it.
10. I love to reuse/recycle stuff in my artwork, so here is the plastic bottom of a store bought cake that I saved because of the lovely honeycomb pattern. I painted and stamped, then filled in a bit with a small brush.

11. I chose a font, printed it out, and taped it together. I used graphite paper underneath and traced over the letters with a pen. (I have practiced calligraphy since I was 12 and taken classes throughout the years both in a classroom and online. Given that little waiver, I use the methods that help me to save time and to get the font spaced and lined up correctly.)
12. I painted the letters black (a couple coats) and let dry completely. Then I shadow the letters under and on the right to make them pop. Let dry.
------------------------
13. Now comes the collage part! I printed out some vintage bees on card stock. I cut them out - just the head, body, and wings. I used a pencil to sketchy outline the honeycombs.
14. I used some matte medium and glued some transparent glitter onto their wings. Let dry completely.

15. Using the matte medium again I glued the bees down. Let dry. I then used the paper scrap as a guide to paint in the bee legs and antenna.
16. I used some gesso to lighten up the wings and highlight some around the bee. Then I used a blue ball point pen and traced around each bee to make them stand out more.
------------------------
17. Almost done! Here I brushed a coat of matte medium over the whole thing to seal it. Be careful where there is pen ink, cause it can smudge. Let dry overnight.
18. Finally, I spray the piece with Krylon UV coating to keep the colors vibrant!

19. A photo I took outside in the snow.
20. The full shot photo.
Oh yeah! I hammered saw-tooth wall hangers on the back. I signed and dated on the back too.
Check out our Etsy shop for mixed media art pieces for your home! Commissions welcome!
I hope you enjoyed this tutorial!
Shawna

